Firefox/Tegra/Device Debugging
From MozillaWiki
Requirements
- Hardware debugger daughterboard
- VisualStudio 2005 (not 2008!)
- Windows CE Platform Builder (part of the WinCE 6.0 Eval Edition)
- Only the "Platform Builder" part is needed when installing, deselecting "CE 6.0 Operating System" and "Windows Embedded CE 6.0 Test Kit" will save gigabytes.
- Tegra OS image
Device Setup
- Reflash your device, enabling Ethernet KITL. You'll need to edit nvflash_oban_nokitl.bat and change the --odmdata flags. See dolske or vlad for the magic numbers.
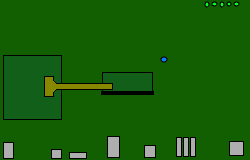
- Connect the hardware debugger daughterboard to the Tegra module. Note that ribbon cable will physically connect either direction, but it must be connected like this to function:

- Connect power and ethernet to the debugger board. The ethernet cable should either connect directly to your PC or via a hub/switch. If you're using VMWare on a MacBook, connect directly to the system and follow the VMWare Setup steps below.
VMWare Setup
If you're running Windows inside VMWare Fusion on a Mac, you'll need to do some network configuration to be able to use the normal network connection as well as the Tegra debugger connection.
# vmnet-bridge puts itself in background (daemon mode)
# Bridge to host network interface 'en0'.
#"$LIBDIR/vmnet-bridge" -d /var/run/vmnet-bridge-vmnet0.pid vmnet0 en0
# Bridge to the primary host network interface (which can change over time).
"$LIBDIR/vmnet-bridge" -d /var/run/vmnet-bridge-vmnet0.pid vmnet0
- You should already have 1 network adaptor working in Windows. The Virtual Machine --> Network Adaptor settings should be in "NAT" mode.
- Shutdown the Windows VM and quit VMWare.
- As root, edit
/Library/Application Support/VMware Fusion/boot.shand find the above lines. Uncomment the first "$LIBDIR...", and comment out the second one.- By default, VMWare tries to bridge to whatever host interface has a working network, which is probably your WiFi connection. Doing this forces the bridged connection to use en0, which is the wired ethernet interface.
- As root, run
/Library/Application Support/VMware Fusion/boot.sh --restart - Start VMWare, and open (but do not boot) your VM.
- Go to Virtual Machine --> Settings, select Network, click "+" to add another adaptor. Set this one to "Bridged" mode.
- Power up the VM.
- In the Windows Control panel, change the 2nd (new) network adaptor to use a static IP address of 192.168.0.10 / 255.255.255.0.
Desktop Setup
You'll need to make sure that the network interface that's connected to the debugger daughterboard has an IP address of 192.168.0.10 / 255.255.255.0. (This was done in the VMWare Setup steps above.)
- Launch VS2005
- From the menubar, select Target --> Connectivity and edit:
- Kernel Service Map
- Set "Download" to "Ethernet". Click the Settings button and reboot your device -- you should see "Tegra_0" as an available target device. Select it and click Ok.
- Set "Transport" to "Ethernet". Click the Settings button, and ensure "Use device name from bootloader" is checked.
- Set "Debugger" to "KbStub".
- Core Service Settings
- Leave "Target Device" as "CE Device"
- Set "Download Image" to "Never"
- Leave all three "KITL Settings" boxes checked.
- Click "Apply" now (otherwise changes will be lost when you go to the next section!)
- Service Status
- Select "Kernel Debugger OS Awareness" and click Settings. Change "Module (un)load Notification to Debugger" to "Always Off" (or "Off Until First Halt"). Leaving this set to "Always On" results in slow boot times, and often causes USB connectivity problems.
- Select "Debug Message" and set to "Asynchronous" (XXX I don't see this option!)
- After rechecking the above settings (sometimes the UI will lose your changes!), click "Close"
- Kernel Service Map
- From the menubar, select Target --> Attach Device. If prompted for an image, select NK.NB0 from the OS image dir you used when reflashing the device.
- You should see
PB Debugger The Kernel Debugger is waiting to connect with target.in the output window. If nothing else happens for a bit (15sec), try rebooting the device. If you're still stuck here, there's probably a connection problem. - You may see a popup window for "Download Runtime Image", ignore it.
- You'll get a prompt asking to locate "nk.exe". Check the "don't ask again" box and click Cancel.
- The device will finish booting, and you will see some bootup spam in the Output tab of VS.
- From the menubar, select Debug -> Symbol Search Path. Enter the full path to your dist/bin dir. EG:
C:\proj\firefox-wince\dist\bin
Using the debugger
XXX Setting breakpoints sometimes requires you to look up the symbol's address using the watch window, and then to set a breakpoint in the disassembly view. Use MSVC context specifiers to specify the dll, e.g.: {,,xul.dll}SomeFunction to specify "SomeFunction" inside xul.dll (note two commas).